This guide will help you provide complete information about the different reasons behind the DRIVER_PORTION_MUST_BE_NONPAGED BSOD and its fixes.
Reasons for DRIVER_PORTION_MUST_BE_NONPAGED BSOD
There are multiple reasons behind the annoying error DRIVER_PORTION_MUST_BE_NONPAGED BSOD. Some people reported it after installing a new hardware device, whereas some reported it after upgrading the Windows OS. Driver Bug: According to the Microsoft document, one of the reasons is that the system attempted to access pageable memory at a process IRQL that was too high. The bug check is usually caused by drivers that have incorrectly marked their code or data as pageable. There can be other reasons as well. Here are the most prominent reasons behind the annoying error DRIVER_PORTION_MUST_BE_NONPAGED BSOD. Generic HDD-related issue: Any generic HDD-related issue can also lead to this annoying error. One can easily manage this error by using the Windows Hardware Troubleshooter. Windows 10 and Windows 11 feature automated fixes options that make things more convenient. Outdated disk drivers: Usage of outdated drivers may also lead you toward this annoying error. You can quickly fix this error by accessing the Device Manager option and forcing the driver to update itself. System File corruption: Any system file corruption also serves behind the annoying BSOD error issue, which sometimes ends with a critical system crash. One can quickly resolve these potential issues by making SFC or DISM scan. HDD Sectors going bad: Usage of traditional HDD that has gone bad also serves behind the BSOD errors. One can quickly deploy a CheckDisk Scan to replace failing sectors with unused equivalents successfully. 3rd party interference: Using third-party sources for servicing, processing, startup, or installation item can also trigger this critical system crash. You can resolve this issue by booting your PC in a clean boot mode and can check if this crash is still happening or not. Suppose it doesn’t uninstall every 3rd party component to resolve the error efficiently.
Fix DRIVER_PORTION_MUST_BE_NONPAGED Blue Screen
Once you have got well aware of the different issues related, you can go with the solutions we are providing below: You will need an admin account to execute these steps. The issue suddenly appears when using Windows PC the usual way. Also, we assume this is not a permanent BSOD that made your Windows Unbootable. If you can boot Windows normally then fine – you can carry out these suggestions in the usual way. But if you cannot boot Windows normally then you need to access the Advanced Startup Options screen or enter Safe Mode and then use the Command Prompt and other tools to carry out these suggestions. If required, you may need to use the Installation Media to boot.
1] Run the Windows Hardware Troubleshooter
Using Windows Hardware Troubleshooter works excellent for resolving the error message DRIVER_PORTION_MUST_BE_NONPAGED BSOD. You will have to run the Troubleshooter using the command line. To invoke the troubleshooter, all you need do is to launch the command prompt, then type or copy and paste the command below and hit Enter. Once the wizard appears, click on the Next button to let it detect the hardware-based problem. If the troubleshooter finds something, you must follow up on the instructions for accomplishing the problem.
2] Update Disk Drive Drivers & Firmware using OEM Software
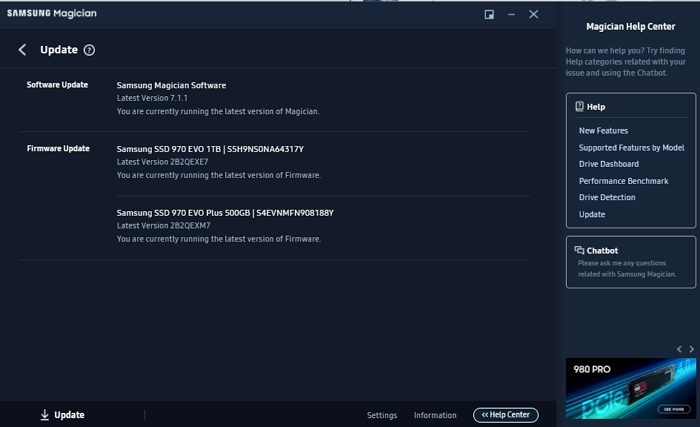
Keeping the HDD & SSD driver and firmware updated is always a good idea. The easiest way to update drivers is by downloading the OEM software and letting it manage drivers & firmware.
These applications run in the background and notify about an update when it’s available. If you don’t remove it from the Startup, it will be easy to manage it in the future. Must read: How to find which Driver is causing the Blue Screen on Windows? If you are not sure, then you can use the Device Manager to find the exact model and then download it from the OEM website:
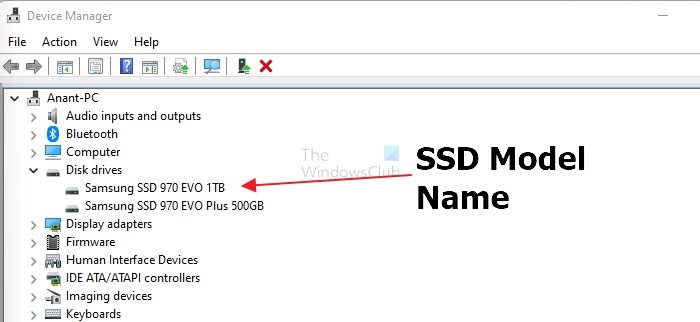
Launch the Run dialog box on your device by pressing the Windows Key and R buttons together.Type “devmgmt.msc” in the provided boxes, and press the Ctrl + Shift + Enter button to open the Device Manager.If you get the User Account Control prompt, tap on the Yes button to grant the admin access.In the Device Manager, expand the DiskDrives optionUsually, the disk drives are listed as per their exact model name. Note it down.Next, you must go to the OEM website and look for SSD or HDD software.Download, install, and if there is an update, please do so.
3] Run SFC & DISM Tools
The SFC Scan is a command-line tool that scans PC for potential errors.
Make a right-click on the Start Menu button on your PC, and click on Command Prompt or Windows Terminal with admin permission.Type SFC/scannow and press the Enter keyWait until the process is accomplished, and it will automatically be applied to your screen.Close the terminal and restart your PC.
For running the DISM tool, the things you have to follow are:
Open Windows Terminal or Command Prompt with admin permissionType the command DISM/Online/Cleanup-Image/restorehealthAnd once done, press Enter to go further with the process.Please wait for the scanning to be accomplished, and restart your Windows PC once done.
4] Disk Checking Tool
Windows offers a built-in Disk Checking tool
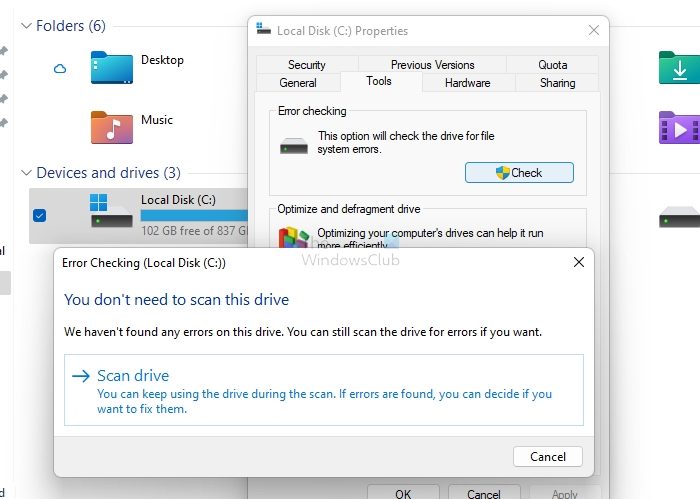
Open File Explorer using Win + EClick on This PC on the left sidebarRight-click the drive where Windows is installed and select Properties.Navigate to the Tools tab and click Check and then click Scan drive.It will internally run the CHKDKS tool, and in case of any error, you will get to know about it.
While the tool attempts to resolve some of the minor issues, if the problem is on the hardware level, you will get to know about it. You can then follow up on the resolution based on that. If you are using an SSD, we recommend using the OEM tool instead of the Windows tool. For example, Samsung offers Magician software for its SSD. The tool offers in-house management of the drive, and it’s best to use it to fix any problem around it. Conclusion It is all about the reasons and solutions for annoying errors DRIVER_PORTION_MUST_BE_NONPAGED BSOD. Resolve the issues as you start facing them and keep your PC safe from unwanted situations.
Why should kernel drivers reside in non-paged memory?
Unlike other programs, Kerner drivers remain in memory as long as the system runs. Since these drivers interact with hardware devices and are critical to the system’s functioning, the allocated memory should never fall short. Paged memory is dynamic and is adjusted depending on the requirement, which doesn’t fit the Kernet driver’s requirement. So to make sure Kernel drivers always have enough, they are allocated memory that is not subjected to paging.
How to Run a Memory (RAM) Test?
Please search for the Windows Memory diagnostic option and click to open it. Once it is on the screen, click on Restart now and check for the option of the problem to move further with the process. Once your device restarts, wait for the result message. You can also use third-party programs such as Memtest86 and Memtest86+, which run from a bootable USB device.