Adjust Screen Brightness on Windows laptop
1] Using Keyboard keys in Windows 11/10
The majority of laptops come with physical keyboard buttons to adjust the brightness. And these keys are usually located in the topmost row. They are usually linked to the Function (Fn) buttons, and there is a separate switch on the keyboard to switch between function keys and these buttons.
2] Via Taskbar Battery icon in Windows 11/10
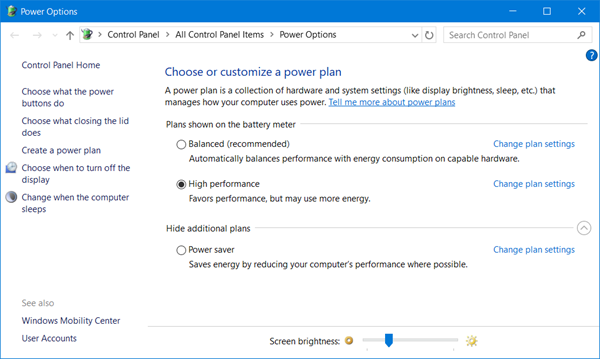
Right-click on the Battery icon in the Windows Taskbar System Tray and select Adjust screen brightness. The concerned Control Panel applet will open. Do the needful here.
3] Via Windows 11 Settings App
The other method involves, using the Windows Settings App to control the brightness of your computer. Because the user interface of Windows 11 and Windows 10 operating systems is not the same, the steps to increase or decrease the brightness are also different for these platforms. Here, first, we will explain the procedure to change the screen brightness in Windows 11 computers, then we will proceed towards the Windows 10 devices. Windows 11 users have to follow the instructions below:
If you are a Windows 10 user, go through the following procedure to change the brightness of your system via the Settings app.
4] Via Windows 11 Quick Settings menu
In Windows 11, you can adjust the screen brightness from the Quick Settings menu or the Taskbar Notification Area. On the other hand, in Windows 10, the option to change the screen brightness is available in the Action Center. Let’s see the instructions to change the brightness in both of these platforms. If you are a Windows 11 user, you have to follow the below-listed steps:
5] Via Windows 10 Settings
Windows 10 users can use the Settings UI to control the brightness of their device. Go to ‘Settings’ and then select ‘System’. Now under ‘Display’, you will find ‘Change Brightness’ slider on the top. Move that slider to adjust the brightness of your device.
If your device comes with sensors capable of light intensity detection, then you might also see ‘Change brightness automatically when lighting changes’ checkbox below the slider. Enable this Adaptive brightness feature if you want the brightness to be automatically adjusted. Adaptive brightness is a feature where Windows checks the lighting conditions of your computer’s surroundings and adjusts the brightness and contrast level automatically.
6] Via Windows 10 Action Center
Apart from Settings, there is another quick way to change the brightness in Windows 10. Open ‘Action Center’ from the bottom right corner and then hit the ‘Brightness’ button. This button would let you change your computer’s brightness in discreet levels of value 25. Apart from this, you can also enable ‘Night Light’ that adjusts the screen colors so that the screen is comfortable to use at night. Using ‘Night Light’ will reduce the stress on your eyes before you go to sleep. Read: How to add a Brightness Slider to Windows 10.
7] Windows10_BrightnessSlider freeware
This freeware was written to simplify the process of adjusting the brightness. It brings a volume like a slider adjuster in the system tray area that can be used to adjust brightness. The slider comes very handy and is easy to get familiar with as we are already using the audio slider. And the program can automatically start itself on every Windows startup so that you don’t need to run it again and again. The tool is completely free of cost and is available along with its source code on GitHub. TIP: You can further reduce or dim the brightness of your laptop screen using a free brightness control software.
Why can’t I change the brightness on my PC?
There could be many reasons you are unable to change the brightness of your PC. In most cases, the issue occurs if the Adaptive Brightness option is enabled. In addition to this, corrupted or outdated display drivers are also responsible for the issue. We will provide some solutions here that may help you get rid of this problem. Let’s have a look at these fixes in detail.
1] Turn off the Adaptive Brightness
As explained earlier, if the Adaptive Brightness is turned on, you will not be able to change your screen brightness. Hence, turn off the Adaptive Brightness and see if it helps.
2] Update your Display driver
You might be experiencing this issue due to the outdated Display driver. Hence, updating it may fix the issue. The steps to do this are as follows: After that, Windows will install the latest version of the Display driver automatically. After the installation process gets completed, restart your device and see if the issue is fixed.
3] Roll Back Display driver
You can also try rolling back the Display driver. For this, repeat the first two steps described above. Now, right-click on the Display driver and select Properties. In the properties window, click on the Driver tab and see if the Roll Back option is available. If yes, click on it.
4] Reset your PC
Some users have reported that they fixed the issue by resetting the computer. You can also try this if none of the above methods fix your issue.
Screen brightness not working
If you are not able to access the brightness slider for an external monitor, then you need to use the buttons provided on the monitor itself. Or you may follow the instructions provided by the manufacturer to adjust the brightness. In any other scenario, where the brightness is not working, or there are no changes even if the slider is working, you may need to reinstall/update the graphics drivers on your computer. There are several free Driver Updater software that can help you do this.
How do I adjust brightness in Windows 11?
In Windows 11, you can adjust the screen brightness by moving the brightness slider. You can access this slider from Windows 11 Quick Settings or Taskbar Notification Area quickly. Apart from that, you can also change the screen brightness in Windows 11 via the Settings app. We have explained the procedure above in this article.