The app is also integrated with Microsoft’s cloud-based service, OneDrive and under one of the Windows updates that were rolled out, it received a very useful feature. This new feature allows users to disable the indexing of certain parts of your library that have been stored in your computer’s network. In this article, we will be showing you how you can enable or disable this option on your Windows 10 computer.
How to disable Indexing of Network Locations in Photos app
It’s a three-step process and very easy to follow. All you have to do is: Open the Photos app. The tile for that can be found up front in the Start Menu, or if you have it pinned on your taskbar.
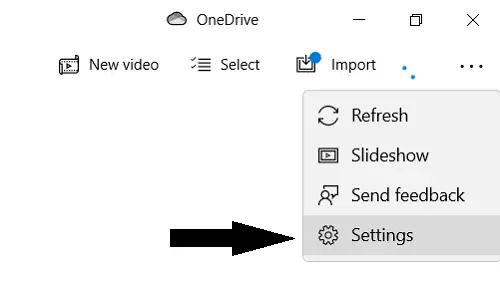
Look at the top-right corner of the app’s home page and you will find a triple-dotted icon. Click on it and further select settings.
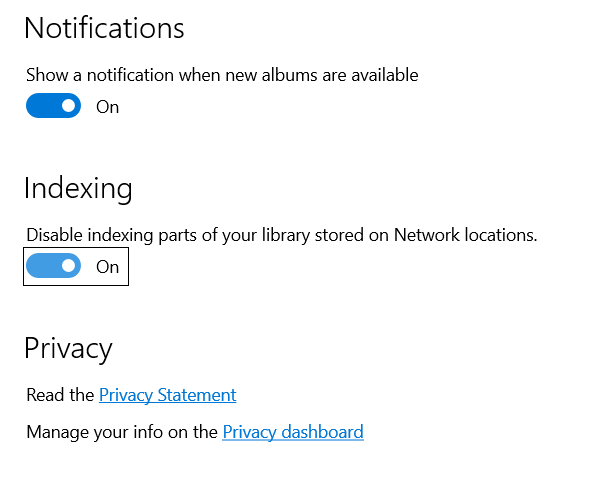
Scroll down a bit till you find an option titled Indexing. The setting is disabled by default but you can toggle the switch back on. Doing so would restrict Windows from storing parts of your library on its network locations.
If you have the Indexing for network locations enabled, you may experience slight issues with your app. Accessing a remote location to add files can hamper your app’s performance. We hope that this post was able to satisfactorily clear your doubt on how to disable indexing of Network locations in your Photos app in Windows 11/10. Read: Add Slow Motion effect to your videos with Windows Photos App.