How to recover files from a System Restore Point
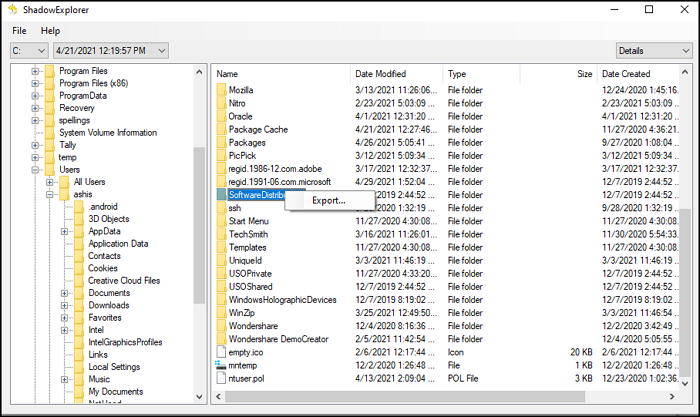
Since Windows doesn’t offer a direct way to open these show copies or restore points, we will use third-party software— Shadow Explorer. This program can read all the System Restore Points and display all the files inside each of them. Download Shadow Explorer from the official website. Once installed, launch the program, and it will instantly read all the shadow copies of the primary drive. On the top left, you can change the drive, next to it, is the dropdown for System Restore. In the image above you see C displayed – and 4/21/2021 12.19.57 PM displayed as the System Restore Point creation date and time. On the top -right side, you will see another drop-down for the View. The files can be viewed in:
Detais,List,Large orSmall icons.
Once you are sure of the selection, navigate to the folder where your file is saved. In the image above, you will see Details displayed. Right-click on the file or folder, and choose to Export. You will be prompted where to save the file. It may take time to copy depending on the file size. The system will prompt if you plan to overwrite if the file already exists. That said, I have noticed that some files give an error when you try to copy them. It could be because there were already locked or are not allowed to copy when the restore point was created. Using this tool, you can also launch System Restore using its Menu > File > Configure System protection menu. It helps to quickly create one if you don’t have any. There are two versions of Shadow Explorer—
Installer andPortable.
If you need it for one-time usage, use the Portable version, else you can always use the Installer. One point to note is that the software has issues if TrueCrypt is being used. In this case, you need to mount volumes as removable media. The option is available Settings > Preferences > Mount volumes as removable media I hope the post helps recover files from a System Restore Point in Windows 11/10.

