In a nutshell, it forms a layer of communication between the hardware and the operating system. Thus needless to say the BIOS is very crucial when it comes to the functionality of your Windows 10/8/7 computer.
Why update the System BIOS
BIOS is, after all, a piece of software that needs to be regularly updated, just to the operating system or the apps in general. The updates usually bake in enhancements and fixes, which will eventually help the software maintain its compatibility with the hardware and the software. That being said, unlike most other apps, the BIOS needs to be updated manually, which is precisely the very thing that we will be explaining in this segment. Most do not need to or have to update the BIOS. If your computer is working properly, you do not need to update or flash your BIOS. In any case, should you wish to, we recommend that you do not try to update your BIOS yourself but instead take it to a computer technician who may be better equipped to do it. One needs to consider updating the BIOS only if you are facing some performance issues or other problems that necessitate you to update the BIOS. One needs to be careful and know how to update the BIOS; else, it could brick your entire system.
How to check your BIOS version
Before updating the BIOS, you need to check the version of BIOS from the System Information. We have already seen how to check the BIOS version. You have to type msinfo32 into the search and press Enter. Once the System Information Tool opens, you can check the BIOS version. One can also run a command in CMD to check the BIOS version. Click on “Start Button” and press Run; once the Run box appears, type system info and then press OK. You can jot down the BIOS number and match it against the latest version from the manufacturer’s website; if needed, update it.
How to update BIOS in Windows 11/10
BIOS helps maintain the stability of your system and increases security, and tries to protect the system from any vulnerability. Before you begin, make sure that you have power backup while upgrading the BIOS. Because if the computer turns off during the process, the BIOS may be corrupted, and you will need a technician to fix it. Your boot CD/DVD may or may not help to depend upon how the BIOS stands after a power cut or a sudden system turn off while rewriting the BIOS. Generally speaking, to update the BIOS, visit the manufacturer’s site to download the BIOS update. Identify your product by entering the Service Tag or serial number. That being said, the update procedure might vary slightly from product to product. It is also worth mentioning that the OEM’s stop updating the BIOS for some of the machines after a certain period. Read: How to reset BIOS settings to default.
Update BIOS by creating a Bootable USB
One can also download the BIOS update.EXE file to a bootable Flash drive and update the same. To do this, first, you need to head over to the official company website and download the BIOS file.
In order to create a Bootable USB Flash Drive use, Dell Diagnostic Deployment Package and the corresponding instructions are given here. Read: How to use BIOS settings on Windows computers.
Using BIOS Update applications
This is the easiest part, and I have been using this method to update the BIOS on my HP Laptop for quite some time. The motherboard manufacturers have their own BIOS update applications, and all you need to do is press a button, and voila! The software will take care of the rest. It’s always advisable to turn off firewalls and other security software since they could meddle with the process. All OEM manufacturers have utilities that help you easily update BIOS, firmware, and drivers. Search for yours and download it from the official site only. This is the safest way to update the BIOS.
If you own a Dell laptop, you can head over to Dell.com or use Dell Update Utility.ASUS users can download the MyASUS BIOS update utility from the ASUS support site.ACER users can go here. Enter your Serial Number/SNID or search for your product by Model, select BIOS/Firmware, and click the Download link for the file you want to download.Lenovo users can use the Lenovo System Update Tool.HP users can use the bundled HP Support Assistant.
Updating the BIOS on HP computers
As we explained earlier, the BIOS update process is slightly different for different brands, and in order to leave no stones unturned, we will also be taking you through steps to update the BIOS for HP systems. Read: How to downgrade BIOS on Windows computer.
Use Lenovo System Update to update BIOS on Lenovo laptops
If you own a Lenovo laptop, the best way to update the BIOS would be to use the Lenovo System Update supported on ThinkPad, ThinkCentre, ThinkStation, Lenovo V, B K, and E-Series. Alternatively, you can directly download the BIOS from the Lenovo support site and install the same manually.
Find the latest version of the BIOS for your machine from the support site.Go to the product > Click on Drivers and Software>Select BIOS>Choose your operating system on the support page.Lenovo advises users to switch off the anti-virus or any firewall before starting the BIOS update.Once the file is downloaded from the support site, extract it and run the same if needed. Follow the onscreen instructions.Restart the computer when prompted to, and voila! Your BIOS is updated.
Update BIOS on ASUS using WinFLASH
To update the BIOS on ASUS systems, you will have to use WinFLASH Utility. Detailed instructions can be found on asus.com. In a nutshell, updating the BIOS is a pretty straightforward process considering that you get the model number right. Most of the recent Windows versions like Windows 10 handle the update process much more elegantly than, let’s say, Windows XP systems.
How to check BIOS version Windows 11/10?
You can check the BIOS version using the Command Prompt in Windows. In the Command Prompt window, type wmic bios, get smbiosbiosversion, and then press Enter. The string of letters and numbers following SMBBIOSBIOSVersion is the BIOS version. Make sure to check the motherboard model to find the latest version of BIOS available on the manufacturer’s website.
How to change Boot Device in BIOS or UEFI?
BIOS or UEFI offers a dedicated section where the boot order of the connected devices or type can be changed. If you need to boot from a USB driver of an external hard drive, you can change the order here and save the settings. Next time the PC reboots, it will look for the connected devices first and reboot if it finds the boot record; else, it will fall back to the last option.
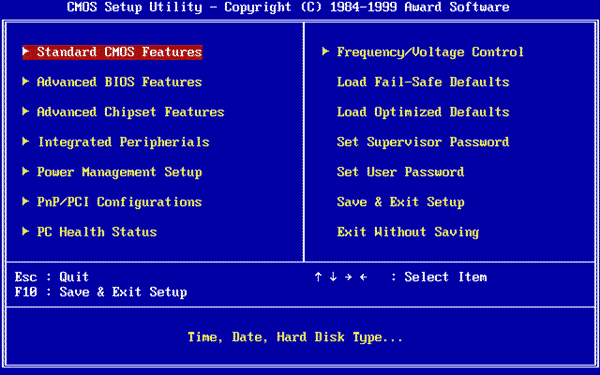
How to lock BIOS with a Password?
If you do not want anyone else to change the settings, putting a password lock in the BIOS is good. Every BIOS or UEFI has a security section where the BIOS password will be available. That said, if you ever forget the password, you will need to reset it. If it’s a laptop, check with manual, but a dedicated Clear CMOS button on the rear of the cabinet is available for motherboards. Resetting the BIOS doesn’t create any motherboard issue but clears anything change in the settings made.