In this post, we will see how to rename your Windows 8.1 computer quickly using PC Settings.
Rename computer in Windows 8.1
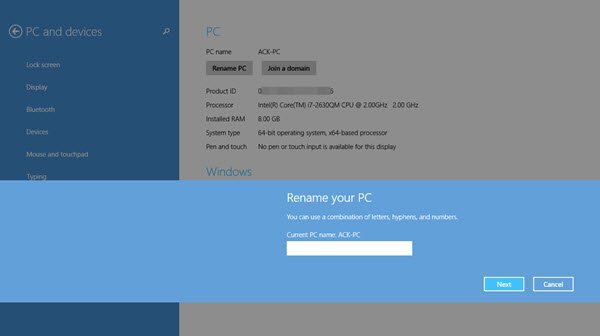
Open the Charms bar and select Settings and then PC Settings. Next click on PC and Devices and then PC Info.
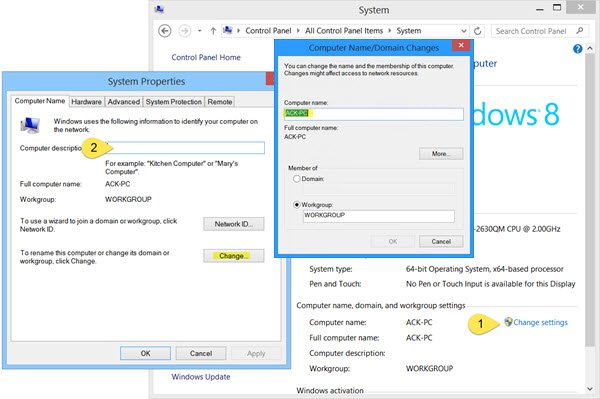
Here you will see the option to Rename PC. Click on the Rename PC link and you will be presented with a box to Rename your PC. Enter the new desired name and click on Next and follow the process to the end. On the restart, you will find that your Windows 8.1 PC has the new name you just set. The Windows 8.1 Update adds many new features. One feature you may miss noticing is that it now allows you to – apart from Rename PC and Change the product key – also Join a Domain or Change the domain membership, as the case may be. The rollout for the Windows 8.1 Update or KB2919355 to Windows 8.1 and Windows RT 8.1 customers via Windows Update should have completed by now and I am sure that you too must have installed it by now – and liking it! Want to have a look at these posts too?